 |
|
 |
 |
 |
 |
 |
 |
 |
 |
 |
 |
 |
 |
 |
 |
 |
 |
 |
 |
 |
 |
 |
 |
 |
 |
 |
 |
 |
 |
 |
 |
 |
 |
 |
 |
 |
 |
 |
 |
 |
 |
 |
 |
 |
 |
 |
 |
 |
 |
 |
 |
 |
 |
 |
 |
 |
 |
 |
 |
 |
 |
 |
 |
 |
 |
 |
 |
 |
 |
 |
 |
 |
 |
 |
 |
 |
|
|
|
|
|
The All Purpose Trail Bikes
|
|
|
|
XR250R’s
|
|
|
|
In 1986 they finally came out with a respectable XR250R (in my opinion anyway) then in 2004 they stopped making them. Now I’ll have a fresh one ‘till I die!
|
|
|
|
|
|
|
They Typically Still Get No Respect!
|
|
|
|
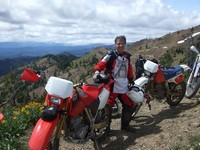
Seems like I’ve always had XR’s around, my 200’s and 350’s precede the 250’s that I own. They are a good platform stock, kind of pedestrian really, but can be made into something pretty darn effective and fun to ride with some real suspension components and a little more life breathed into them. It’s almost impossible to even think about selling one off when it still works so well. They’re hard to replace and only require the maintenance of a claw hammer.
|
|
|
|
-Click to enlarge most images on this page-
|
|
|
|
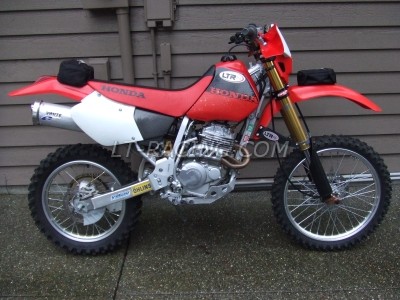
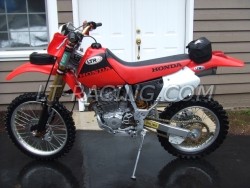
The 2004 XR250R Ohlins Fork & Shock
|
|
|
|
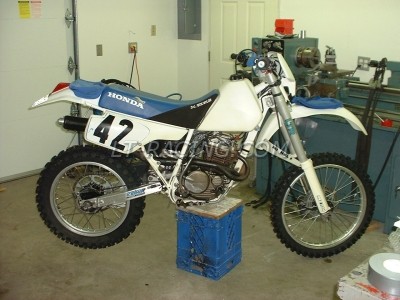
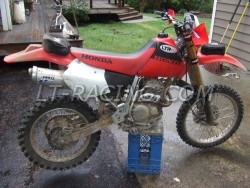
The 1986 XR250R WP Fork & Shock
|
|
|
|
|
 |
|
 |
|
|
|
The basic specs of my 2004
|
|
Recently sold to my brother
|
|
|
|
The 2004 was a far easier process getting dialed in after so long owning and refining the ‘86. Bought it lightly used, tore it all the way down and built a turn key finely tuned and dialed in machine on the first kick! It was a one two punch, first I did one for my friend Jeff, then did my own.
|
|
There were goodies galore available for this bike when it came out, problem was that most of them were NOT improvements at all! Boy we bought some bummer crap, but it ended up being a great machine after sifting through some aftermarket garbage! Just the one bike for me that I still have, But we ended up doing a total of 4 for Jeff! A 1986, ‘87, ‘93 and a 1995.
|
|
|
|
- Frame and Suspension
- Ohlins rear shock for XR250, +1.5 mm length to balance with front
- Ohlins 46 mm OR a Marzocchi 45 mm Shiver inverted fork, re-valved & re-sprung for application
- BRP Billet upper and lower clamp set, special 20 mm offset for 2005 CR250R, modified for XR with pocketed billet steering stops, billet headlight support, upper clamp sleeve for stem diameter.
- Steering stem machined from 7075 billet allowing for maximum grip length in clamps, XR bearing diameters and longer overall length for thicker clamp set.
- Stainless billet oversize (+2 mm) front axle with machined 7075 aluminum axle sleeve nut.
- Speedo drive, bearing hub collar and spacer modified for +2 mm axle. Longer KJ9 speedo cable with custom cable guide.
- Integrated Stainless caliper spacers
- Pro Taper bars, SX top bar clamp, lower rubber mount handlebar bushing with solid nylon upper.
- Grease fittings installed on Swing Arm pivot.
- 14T counter, 51T stealth sprocket (3.64 ratio) with RK GXW Gold chain.
- XR400 kickstand
- CRD frame guards
- CRD modified skid plate
- Michelin S12 tires front & rear
- IMS pro stock pegs
- Galfer S/steel braid brake lines F&R
- Brake caliper Speed bleeders F&R
|
|
|
|
|
- Frame & Suspension
- WP 4054 Multi-Adjuster fork, a kit was offered by White Bros. made by ProTec that had the billet clamps, axle and basic components for fit-up.
- WP 46 mm Multi-Adjuster remote reservoir shock specifically for this model. Both the fork and shock are completely reworked and re-sprung.
- Pro Taper CR mid bars. Rubber/solid mounting
- Top shock mount is adjustable by captured veneer eccentric to adjust rear ride height.
- 14T counter 50T Sunstar sprockets RK O-ring chain
- Michelinn S12’s front & rear
- Galfer S.S. braid brake hose
- Late Nissin CR front brake master & caliper with speed bleeders
- Late XR headlight shell # plate
- Numerous lightweight aluminum fasteners throughout
|
|
|
|
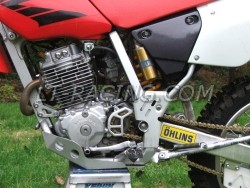
- Engine
- Bored to 300cc 10.2:1 piston
- Cylinder head port and polished, D shape, increased valve bowl capacity
- Glass bead finish -Matched manifolds and header pipe
- Precision 3 angle valve job
- Nickel bronze bushed small end rod
- 35 mm KeiHin FCR pumper carb (Perfectly dialed in, I was installing these on machines years before they first came out as stock production on the first YZ426’s)
- XR600R Intake boot
- Intake box and cage mods
- Mandrel bent, hand made, purged, TIG welded exhaust header/collector by Master Bob Strode.
- 2 Exhaust tail sections, White Bros. MegAlloy and modified stock can with step-up mid pipe.
- XR400R oil cooler (double size of std. 250R)
|
|
|
|
- Engine
- Bored to 277 cc with J&E 10.5:1 piston.
- Kibblewhite intake and exhaust valves
- Cylinder head port and polished, D shape, increased valve bowl capacity.
- Glass bead finish -Matched manifolds and header pipe.
- Precision 3 angle valve job
- 34 mm Kei Hin roundslide pumper carb (XLX350R, South American model), oval bored to 34 x 36.5, fuel jets calibrated to application
- Hinson clutch basket
- 3 exhaust configurations. Stock with small baffle, stock with S.Steel Baja baffle and White Bros. Pro Meg, internally modified plus quiet insert and 360 degree diffuser.
- Hour meter
- Intake box and cage mods
- Weight ready to ride without fuel STOCK was 246 lbs.
- Modified weight ready to ride plus all modifications, no fuel is 247.5.
|
|
|
|
|
Plus many more things I’m forgetting. This has a ton of miles on it, but it’s still a very tight well cared for machine. I feel it’s faster than the 2004 because of the displacement with a slightly lower C.R., FCR carb, and the Bob Strode hand made tuned header for this configuration. The way it pulls nice and strong from idle on up, and rev’s to the moon! It sounds very distinct at high RPM’s
|
|
|
|
|
The typical process of doing an XR250R conversion
|
|
|
|
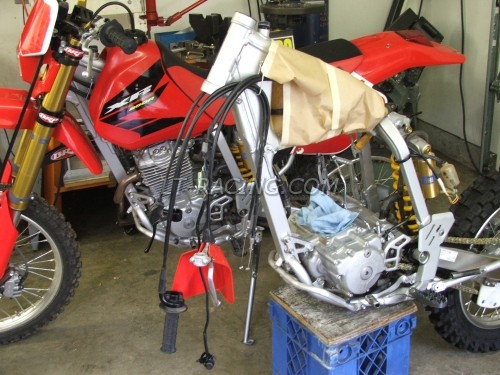
After doing so many of these bikes in different configurations and participating in other similar projects, here is the basic re-work.
|
|
|
 |
|
|
Gather up all of your new goodies before you start. You will be spending a lot of time measuring, designing and adapting these various parts so you better start out with a perfectly immaculate bike before you start. As you remove the parts, you will clean, lubricate, lock-tight and torque every other part on the bike as you go along. Start out clean and make the whole process more enjoyable.
Once you have it all apart, focus on one component at a time, do it right once or 3 times poorly, choose your path. Focus on each component to its completion and then move to the next. Plan it out and do it methodically, so you don’t have to remove something you’ve completed to gain access to another component to start on.
|
|
|
|
|
Get your engine work taken care of, the cylinder boring, head work and any other changes you are making should be completed and the engine reassembled and sealed up promptly so its not sitting wide open waiting for parts to be misplaced or foreign objects to find their way in.
Trust and use ONLY the factory OEM manual, period. There is a major difference from the non-OEM stuff. Don’t even bother with them.
Be careful in what hop up parts you choose. There are many that will set things backwards but you’ll feel good about it since it was “expensive or trick”. Just because its supposed to be better, isn’t necessarily true. A loss of power over a range of 5,000 RPM only to gain 2 HP for 1500 RPM is NOT a gain!
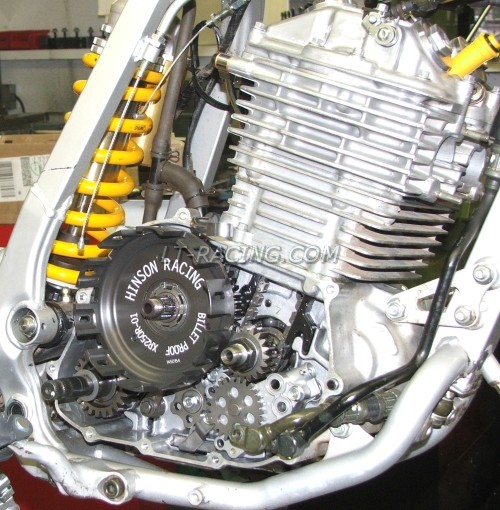
Like my Hinson clutch basket, I’m not a clutch abuser and will probably never benefit from anything it might offer. But the part was being closed out cheap, I was in there and it got installed. There was no other justification for it whatsoever.
|
|
|
 |
|
|
|
|
|
The Triple Clamps, Forks and Front Wheel
|
|
|
|
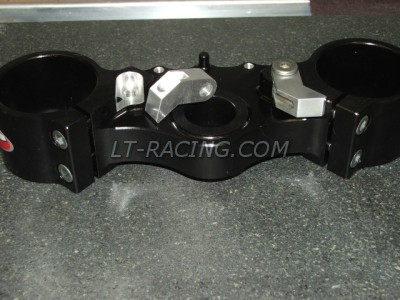
We used BRP billet clamps for one reason; They ARE the best.
|
|
|
 |
|
|
 |
|
|
|
|
|
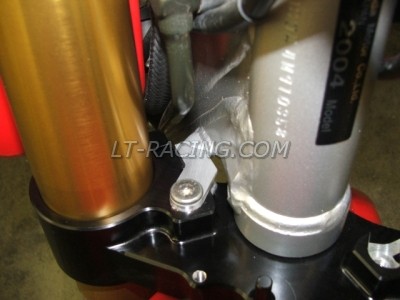
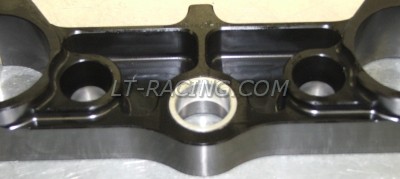
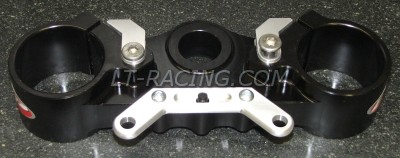
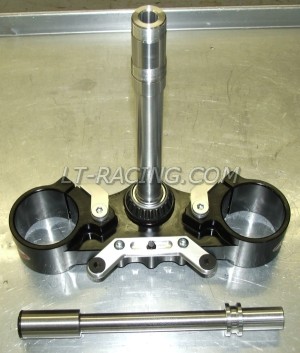
I cut pockets and drilled/tapped the CR triples to house the steering stops that I machined to match up to the XR frame stops. This allowed full steering sweep with a strong, secure stop. I have a hard time hacking a frame for a non stock part, I would prefer modifying the non stock part to match the application.
|
|
|
|
 |
|
 |
|
|
|
|
|
|
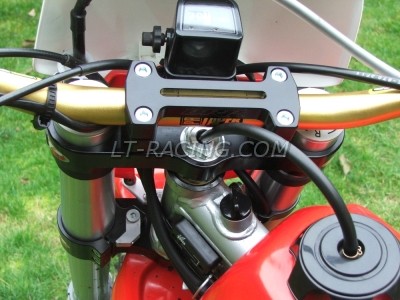
A bracket was machined to accept the stock Headlight case and a bushing was machined to fit the new steering stem.
|
|
|
 |
|
 |
|
|
|
|
 |
|
|
|
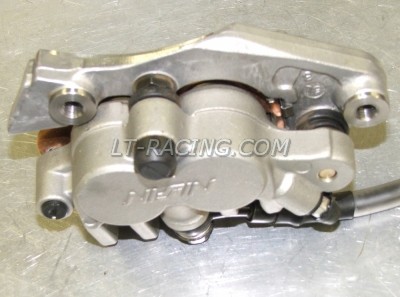
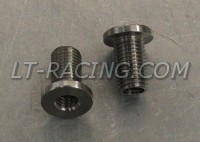
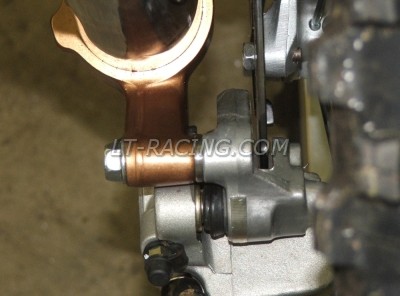
Instead of having 2 loose caliper spacers for the CR width forks, I made 2 stainless threaded inserts for the caliper holder. These space the caliper and provide stronger threads for mounting without 2 loose spacers.
|
|
|
|
|
|
It’s easier to make a complete new stem than to mess around adapting if you are able to. Ours are made from 7075 along with the new wheel spacer, the larger axle is made from hollowed Stainless Steel billet
|
|
|
|
|
|
|
|
 |
|
|
 |
|
|
|
|
Click on the below images for larger view
|
|
|
|
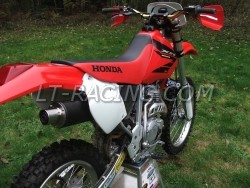
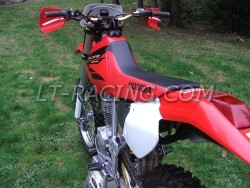
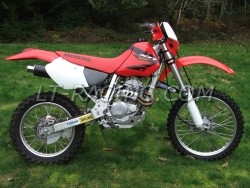
We have both Marzocchi Shiver 45 mm forks or Ohlins 46 mm forks for the 2004 bikes, using this clamp set will also allow you to use the CR/CRF 47 mm Showa fork with the complete Honda front wheel etc. Which fork is better regarding the Ohlins or Marzocchi? Set up correctly, there actually is no real difference. There is no “magic” to an Ohlins fork at all, its all in the set up and that is the determining factor. The quality is pretty close to identical as well. But, the Ohlins does offer a lot of BLING.
|
|
|
|
 |
|
|
 |
|
|
 |
|
|
|
|
|
|
|
 |
|
 |
|
 |
|
|
|
 |
|
 |
|
|
|
|
 |
|
|
|
|
|
|
|