 |
|
 |
 |
 |
 |
 |
 |
 |
 |
 |
 |
 |
 |
 |
 |
 |
 |
 |
 |
 |
 |
 |
 |
 |
 |
 |
 |
 |
 |
 |
 |
 |
 |
 |
 |
 |
 |
 |
 |
 |
 |
 |
 |
 |
 |
 |
 |
 |
 |
 |
 |
 |
 |
 |
 |
 |
 |
 |
|
|
|
|
|
Suspension Topics
|
|
|
|
|
|
|
|
First, set your rear sag. Correctly
The first thing you should do is to set the rear rider sag. We cannot express the importance of this enough. Typically, the owners’ manual will state the fitted spring rate and sometimes the ideal rider weight for the stock spring. It should also note the standard rider sag value, write this down. Get the correct spring rates for your weight and type of riding both front and rear. We can help with this if you need. Although not ideal, Its much easier to ride equally firm or equally soft suspension than it is if they are out of balance front to rear. Install the correct springs and keep in mind that springs do take an initial set after 6-8 hours use, so plan on checking it later.
|
|
|
Once again, here’s how
|
|
|
|
Its in most manuals, its all over the net and most of your riding buddies know how. You’ll probably need an extra hand doing this, make sure they know how to read a ruler. Its much easier using a metric one too, but maybe that’s just us. Have the rider sag (sometimes referred as “race” sag) measurement from your manual for reference.
|
|
|
|
 |
|
|
|
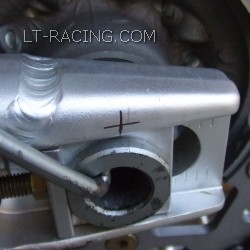
Consistent, repeatable measurements are essential. First, make yourself a reference mark, centered over the axle with a cross hair. You will eliminate the visual variations that occur when you use the center of a hollow axle.
|
|
|
|
|
|
 |
|
|
|
|
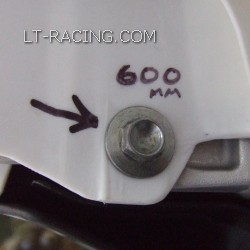
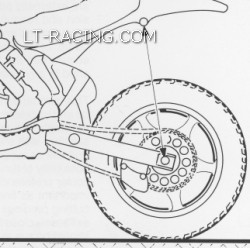
Your next reference mark will be a location that you can easily hook your tape measure to. For this machine the forward inner fender bolt works out great for more than one reason. The reference mark on the swing arm and this reference mark are very close to parallel with the shock angle. This allows for precise repeatable measurements.
|
|
|
|
|
|
|
 |
|
|
|
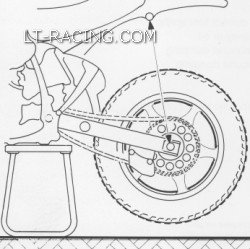
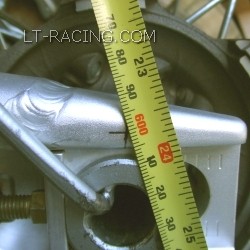
With the machine on a stand and the wheels off of the ground, you can measure the unloaded specification. This is the distance from your top reference point to the reference point you made on the swing-arm.
|
|
|
|
|
|
 |
|
|
Record your value, you might want to consider keeping this for future reference. This value is 600 mm, you might note that this is recorded 2 images up directly inside the rear fender. Its handy where & when you need it.
|
|
|
|
|
|
 |
|
|
|
|
|
|
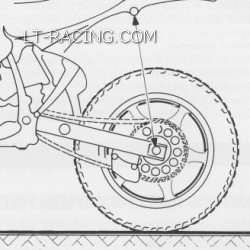
Take the machine off the stand and take your loaded measurement. You will need your gear on and a helper to do this. You must be careful to keep your weight bias front to rear very consistent. It is preferable to weight the pegs standing in your attack position. If you are doing this measurement sitting on the saddle, the measurement will change depending on how far back or forward your butt sits, not very repeatable so avoid doing this.
|
|
|
|
|
|
Now you have both measurements you need. The loaded value was 495 mm, subtract this from the unloaded value of 600 mm and you get a difference of 105 mm, this is your rider sag measurement. If 105 mm was the number you were after, lock things down. If you were after 100 mm, you would put the bike back on the stand and apply more pre-load to the spring to achieve your desired result. If you were after 110 mm, you would remove spring pre-load. We will be adding information on this subject to obtain certain handling characteristics and rider sag settings very soon.
|
|
|
|
 |
|
|
Once your rider sag is set and everything locked down, you can check your static sag. Note we said CHECK not adjust. Static sag is a checking value to reasonably verify proper spring rate, its not an adjustment.
|
|
|
|
|
|
Static sag is measured by letting the machine sit on the ground with only the weight of the bike. Measure the distance between your reference points. Subtracting the static value, 575 mm from the unloaded value of 600 mm will equal the static sag of 25 mm.
|
|
|
|
|
|
|
There are several different designs of suspension systems with each having their own design parameters. Have your factory service manual available, they usually provide the specific baseline numbers for your machine and you can vary from these to obtain your desired characteristics
|
|
|
|
|
|
|
|
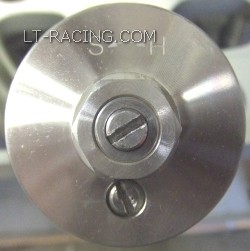
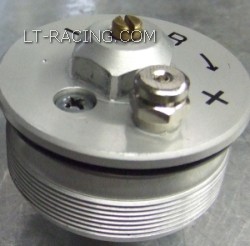
Equalize the air pressure
Before you ride, let the pressure within the fork equalize with the atmospheric pressure. Whenever the ambient air temperature increases or decreases, the pressure within the fork changes.
|
|
|
|
 |
|
|
|
 |
|
|
|
Or touch the bleeder
|
|
|
Open the screw (lower)
|
|
|
|
|
|
|
When you hear the Psssst noise, most riders think it only builds up. This is not so, its just as likely that its vacuum as it is pressure, the noise you hear could be either. If its pressure build up, the action gets sharp and the static height may decrease, it will get worse as you ride because the components warm up and pressure increases. If its vacuum, it will seem softer and mushy, the static height may decrease. Normalize the pressure before you ride.
|
|
|
|
Touch Bleeders
|
|
|
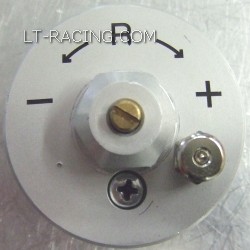
We like them! What we don’t care for is the fragile aluminum stand off on some of them. Most times, they stick up too far and interfere with the handlebar. The small push button is great. When the bleeders are direct fit, drilled, tapped and counter-bored (if needed and if possible) without the standoff, they only sit 9 mm high. We perform this operation, just ask. The parts are $16 and labor to drill, tap and counter bore is $15. When done in this fashion, they can be located to still utilize the stock bleed screw. Why would you want this? So you can easily add fluid with a syringe if you want more fine tuning capabilities.
Yes, we suppose you can depress it with direct pressure washer spray and get some moisture in your fork. There are several places you shouldn’t direct pressure washer spray on your bike. Rule number 1, don’t be a DORK!
|
|
 |
|
|
|
|
A rare but it happens story; On a few occasions we received sets of forks with the customer stating that they clank and are very harsh. We were barely able to compress them. Somehow, so much air had built up within them they would hardly move. When the bleed screws were removed they blew off for about 15 seconds with tremendous force! Bleed them down occasionally. When you remove the screws, do it slowly since they may fly into the “small parts black hole” forever.
|
|
|
|
|
|
|
|
Don’t get your forks in a bind!
|
|
|
|
We’re working on this section, check back soon.
|
|
|
|
Results and cause of fork binding shown here
|
|
|
|
|
|
|
|
Is your Sachs shock grunting, moaning or groaning? Did it turn into an expensive spring guide and work like a pogo stick?
Recently we’ve had some of these coming through the shop, there are 2 unique and separate issues that we have resolved for the Sachs shock. It isn’t typical to see both issues on the same shock and it isn’t common enough to condemn the whole lot of them and prescribe the repair for every Sachs shock that comes through our door.
The first issue is a horrible vibrating grunt noise emanating from the shock on the rebound stroke. You can usually change the pitch or harmonics of it by increasing or decreasing the rebound damping, you know, that adjustment screw at the bottom of your shock? It sounds BAD, really bad! Not to worry though because we have isolated the problem and have a proper fix for this, and no, it wont cost a body part to repair it. The charge is just a normal shock service. We’ll even kick in the 25 cent countermeasure repair part no charge, such a deal we have for you! Click here for technical info.
The second issue is a loss of damping, usually when the shock gets heated up. About 5 minutes into your favorite ride, it will act like a pogo stick! Let it cool down and all is well....... but only for a few minutes until it heats back up. You can try to increase the damping, but it isn’t going to help. Not at all. You have a pogo stick, you need to get it repaired. We have an updated part in stock ready for you, its about $20 plus the cost of a normal shock service and it won’t happen again. Click here for technical info.
|
|
|
|
|
|
Suspension Lowering
|
|
|
|
We have been lowering suspension since LT Racing was first opened in 1994. Our lowering service has covered many different applications. Over the years, we have done everything from your standard enduro bike lowered 1” to a full blown flat track conversion that lowers the bike 6”. At LT-Racing, we have the advantage of having our own machining tools on site. These are used to make our custom parts, special tools, perform modifications, and to make repairs.
For the typical off road bike, it is a fairly straightforward operation when done within reason. A 1” (25 mm) drop is quite noticeable and probably the most popular amount that suits many riders. 1.5” (38 mm), 1.75” (45 mm) and 2” (51 mm) are also common. Because we custom machine each spacer used, we are able to lower your bike in any increment you desire. The following are a few things to consider when looking at this modification.
|
|
|
|
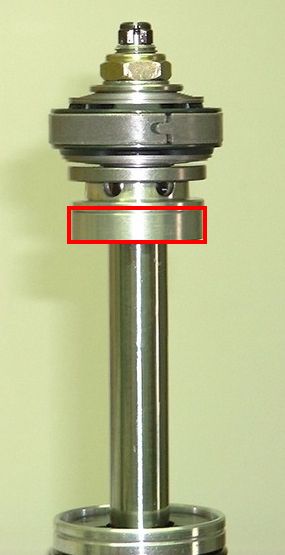
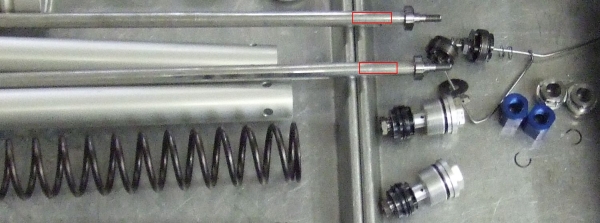
- We custom machine each set of internal spacers for each job. There are several different configurations of these spacers depending on the specific shock or fork. To the left is a typical aluminum spacer located between the seal head bumper and the valving base plate. Below is an example of a fork damping rod where the spacer sits between the top out spring within the cartridge and the rebound tap.
- We make all lowering modifications to be completely reversible,This is the best and safest way to go. Please note that disassembly is required to return to standard height
- You will lose the same amount of ground clearance and total suspension travel you choose to lower the bike. We are very proficient in making the shortened travel work quite well, most customers never even miss it.
|
|
|
 |
|
|
|
|
|
Shock lowering spacer.
|
|
|
|
|
|
|
 |
|
|
|
Spacer location within cartridge
|
|
|
|
- For most lowering applications 1” (25 mm) or less, we are able to utilize the stock length springs. Some machines can easily go further, some not at all. We are able to provide shorter springs in the correct rate for your application, on some occasions we will have them custom made for your needs.Please note this may require a short lead time and an additional charge. We will always choose the best and most cost effective means possible for your job.
- In most applications, we do NOT recommend commercially available lowering links. We have manufactured these for GasGas motorcycles in the past to lower the seat .4” (10 mm) and .8” (20 mm) this is a fairly conservative amount. A link that will drop the seat height 1” (25 mm) or more will usually lead to a number of problems. It can make the tire impact the the inner rear fender. And by dramatically altering the rising rate ratio, much firmer springs are required. The bottom line is that these can create a lot of suspension issues you really don’t want to deal with.
- We recommend that both the fork and shock be lowered the same amount to maintain the proper chassis geometry. And only in specific cases would we approve an imbalanced lowering configuration.
- Since the shock is operating on a linkage ratio, the spacer within the shock will be shorter than the desired lowered seat height. Example; If your linkage ratio is 3.5, a 3 mm spacer will lower the seat height 10.5 mm.
- If your machine has a kick stand, you may need to shorten it.
- We may require some additional measurements from you on some models, we will let you know this when you contact us for this service.
|
|
|
|
|
|